Options spreads - the complete guide
Spreads are common defined-risk options structures. They combine two or more options into a single defined-risk position - helping traders define directional or range-bound risk before an order is considered.
What is an options spread?
An options spread combines two or more options on the same underlying into one position. Most basic spreads use the same expiration date, so the trade has one shared timeline for entry, exit, and expiration risk.
The simplest version is a vertical spread: same expiration, same option type (calls or puts), and different strikes. One leg is bought and one leg is sold, which helps define the trade's maximum risk and maximum reward before entry.
Spreads matter because they solve the two biggest problems traders run into when selling premium: undefined risk and capital efficiency. A naked short put on a $100 stock theoretically risks $10,000. A bull put spread with $5 between strikes risks $500. Same directional thesis, twentieth of the capital exposed.
Why traders graduate to spreads: They let you express a directional, neutral, or volatility view with a hard cap on your downside - and they can reduce buying-power requirements compared with undefined-risk short options.
Section 1
Credit spreads
Net credit upfront. Designed to benefit if the underlying stays on the planned side of the short strike. A common structure for premium-selling traders.
A credit spread is built by selling one option and buying another further out-of-the-money in the same expiration. Both legs share the same expiration date, which is why the trader reviews the whole spread as one position. The sold leg generates premium; the bought leg caps the risk. You receive a net credit when you open the trade - that credit is your maximum profit.
Credit spreads come in two flavors:
- Bull put spread - sell a put, buy a lower-strike put. Bullish to neutral bias.
- Bear call spread - sell a call, buy a higher-strike call. Bearish to neutral bias.
Bull put spread
A bullish-to-neutral defined-risk trade. You believe the stock will stay above your short strike through expiration.
Construction
- Sell 1 put at strike A (closer to ATM)
- Buy 1 put at strike B (lower, further OTM)
- Same expiration
Risk profile
- Max profit: net credit received
- Max loss: (A - B) x 100 - credit
- Breakeven: strike A - credit
Bear call spread
A bearish-to-neutral defined-risk trade. You believe the stock will stay below your short strike through expiration.
Construction
- Sell 1 call at strike A (closer to ATM)
- Buy 1 call at strike B (higher, further OTM)
- Same expiration
Risk profile
- Max profit: net credit received
- Max loss: (B - A) x 100 - credit
- Breakeven: strike A + credit
Section 2
Debit spreads
Pay a debit upfront. Designed to benefit if the underlying moves in the trader's planned direction. A lower-premium way to express a directional thesis, with capped upside and capped risk.
A debit spread is the mirror image of a credit spread. You buy one option and sell another further out-of-the-money in the same expiration to offset the cost. Both legs share the same expiration date, so the trader can review the directional thesis, risk, and exit timing as one position. You pay a net debit upfront - that debit is your maximum loss.
Debit spreads are used when you want directional exposure but the premium on a single long option is too rich (often the case when IV is elevated). The sold leg cheapens the trade in exchange for capping your upside.
- Bull call spread - buy a call, sell a higher-strike call. Bullish bias.
- Bear put spread - buy a put, sell a lower-strike put. Bearish bias.
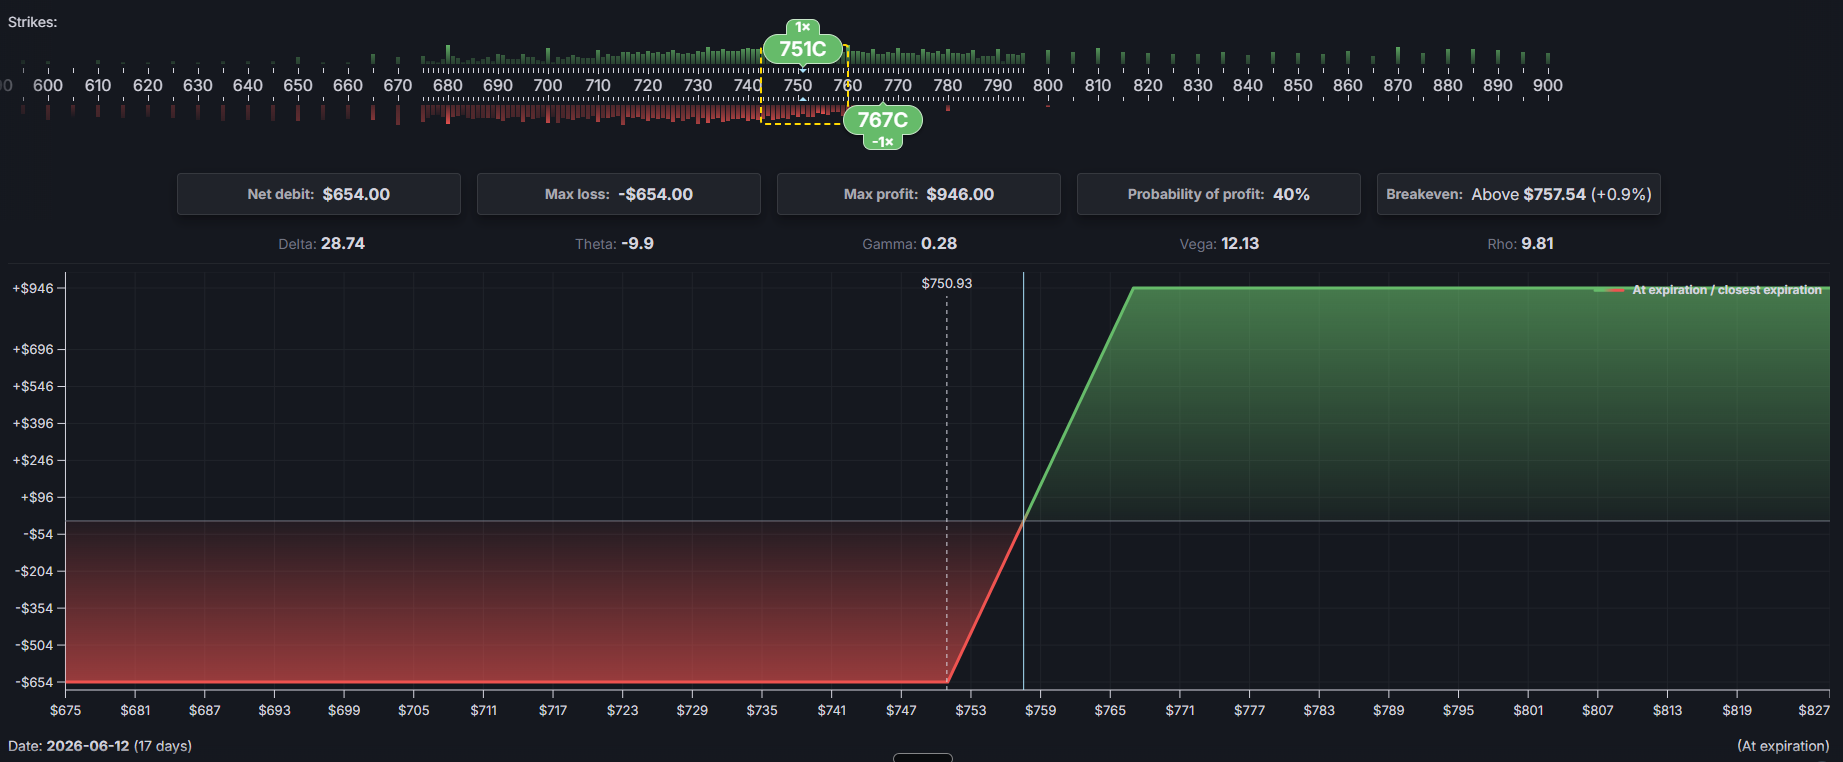
Bull call spread
A bullish directional trade with capped risk and capped reward.
Construction
- Buy 1 call at strike A (closer to ATM)
- Sell 1 call at strike B (higher, further OTM)
- Same expiration
Risk profile
- Max profit: (B - A) x 100 - debit
- Max loss: net debit paid
- Breakeven: strike A + debit
Bear put spread
A bearish directional trade with capped risk and capped reward.
Construction
- Buy 1 put at strike A (closer to ATM)
- Sell 1 put at strike B (lower, further OTM)
- Same expiration
Risk profile
- Max profit: (A - B) x 100 - debit
- Max loss: net debit paid
- Breakeven: strike A - debit
Section 3
Iron condors
A bull put spread and bear call spread combined for a range-bound thesis.
An iron condor is two same-expiration credit spreads combined into one range-bound position - a bull put spread below the stock and a bear call spread above. You collect premium from both sides, and the trade is designed to benefit when the stock stays inside the wings.
Iron condors are commonly used for range-bound market views. Traders often focus on liquid products because spread width, fills, and exit quality matter.
Iron condor
Four legs, one neutral position. Defined-risk on both sides.
Construction
- Sell 1 put at strike B, buy 1 put at strike A (A < B, both below stock)
- Sell 1 call at strike C, buy 1 call at strike D (C < D, both above stock)
- Same expiration
Risk profile
- Max profit: total net credit
- Max loss: width of wider wing - credit
- Breakevens: B - credit and C + credit
Credit vs. debit spreads - which to use
Same defined-risk skeleton, opposite mechanics. Here's how to decide.
| Credit spread | Debit spread | |
|---|---|---|
| Cash flow at open | Receive credit | Pay debit |
| Max profit | Credit received | Spread width - debit |
| Max loss | Spread width - credit | Debit paid |
| Often used when | Stays on your side / sideways | Moves directionally |
| Often used when IV is | High (richer credits) | Low (cheaper debits) |
| Probability profile | Often higher, depending on strike selection | Often lower, depending on debit and target move |
| Risk:reward | Worse (smaller win, bigger loss) | Better (smaller loss, bigger win) |
Rule of thumb: sell credit spreads when IV is high and you expect mean reversion or stagnation. Buy debit spreads when IV is low and you have a directional thesis.
How to choose the right spread
Picking a spread is a function of three inputs: your directional view, the current implied volatility regime, and your time horizon.
1. Directional view
If you have a bullish thesis, that points you to either a bull put spread (credit) or a bull call spread (debit). Bearish thesis? Bear call spread (credit) or bear put spread (debit). Neutral / sideways? Iron condor or short strangle.
2. Implied volatility regime
Check IV rank - a measurement of where current implied volatility sits relative to its recent range. Higher IV can make premium-selling structures more attractive, while lower IV can make debit structures less expensive, but liquidity, risk, and thesis still matter.
3. Time horizon and strike selection
Some traders use 30-45 days to expiration for credit spreads to balance theta exposure and gamma risk. Debit-spread timing depends on catalyst, thesis, liquidity, and risk plan.
Short strike selection is often expressed in delta. Delta can help estimate directional exposure, but it should be combined with liquidity, spread width, timing, and position sizing.
Common spread mistakes
Closing winners too early, losers too late
A common spread mistake. Define exits before entry, including profit targets, loss limits, time-based exits, and conditions for skipping a trade.
Trading credit spreads in low IV
Low IV can reduce credit received relative to the risk taken, so spread width, liquidity, and position size need extra review.
Holding through expiration without a plan
Gamma risk can rise quickly in the final days before expiration. Some traders use a 21-DTE exit rule to reduce late-expiration gamma risk, but the right rule depends on the strategy, product, and risk plan.
Sizing too big
Defined-risk does not mean the trade is without risk. Losses can offset multiple winners, so position size needs to fit the trader's written risk plan.
Automate it
Build supported spread automation with agents
OptionsRobot supports common spread automation. Define the rules, simulate behavior, review risk, and enable automation only when the setup is understood.
- ✓ Automation paths for bull and bear credit/debit spreads
- ✓ Iron condor automation with delta-based strike review
- ✓ Automated profit-taking, stop-loss, and roll rules - define the setup, review it, and monitor it over time.
- ✓ Use simulation until the automation behavior is understood
Frequently asked questions
What is a vertical spread?
A vertical spread is the simplest options spread: two options of the same type (both calls or both puts), same expiration, different strikes. Credit spreads and debit spreads are both verticals.
What is the difference between a credit spread and a debit spread?
A credit spread receives premium upfront and is designed around the underlying staying on the planned side of the short strike. A debit spread pays premium upfront and is designed around a directional move that justifies the debit paid.
How much money do I need to trade spreads?
A single $5-wide spread risks up to $500 minus the premium received. Account size, diversification, and position limits should be reviewed before trading spreads.
When should I close a credit spread?
Common management rules include defined profit targets, loss limits, time-based exits, and expiration-risk controls. The right rule set depends on the product, spread width, liquidity, and trader risk plan.
Are iron condors worth trading?
For traders with no directional view in a high-IV environment, iron condors offer defined risk on both sides, but they still require active monitoring and clear exit rules. Many traders focus iron condor automation on liquid index products because liquidity, spread width, and execution quality matter.